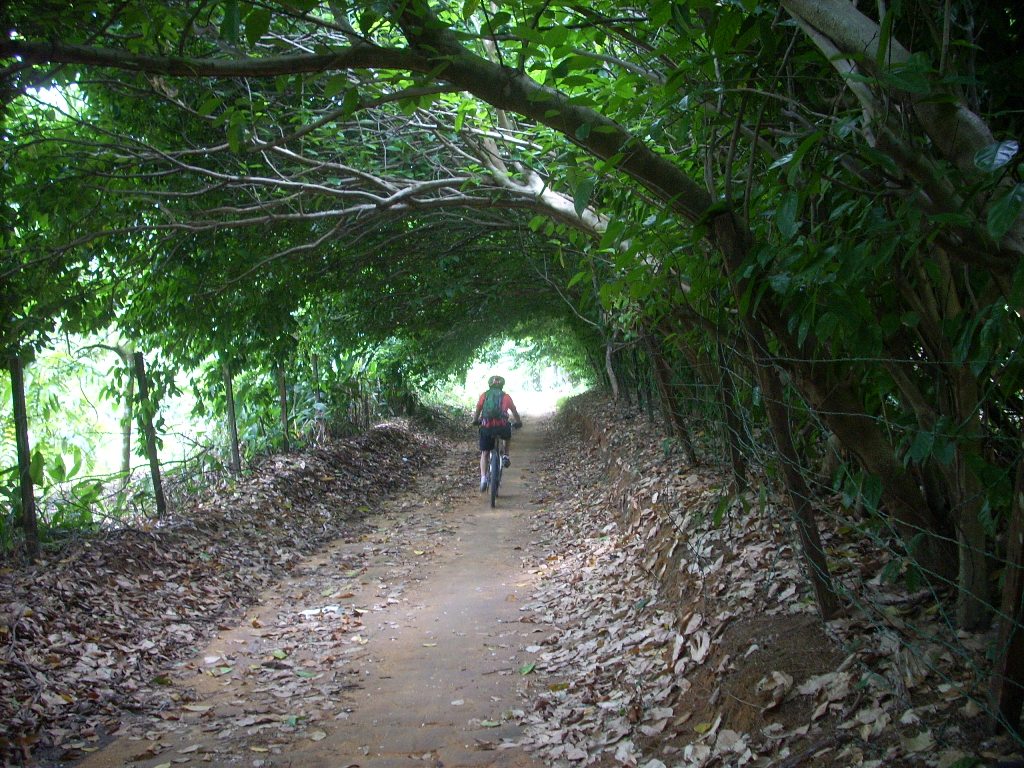
akmal's bike park

akmal's bike park
Showing posts with label reviews. Show all posts

Sunday, 22 May 2011

Review: Ibera beam rack with bag


Ibera Pakrak beam rak with bag
I heard about them only when I bought the rack and bag at Senawang. Perhaps you won't find these orange/black items quite easily in bike shops in Malaysia, compared to the more established yellow/black ones. Anyway, this review is to highlight the hits and misses, based on my usage. More importantly, is to assist those who are wondering if these are as good, for there are not many reviews around the internet.

item
Ibera RA-1 beam rack and Ibera BA-1 commuter bag.
It's a system of a beam rack and commuter bag, with push-lock and secure tab on the bag to fit on the beam rack.
The beam rack is secured to the bike's seatpost by means of tightening an allen bolt.

price
I paid RM228 (RM69 beam rack, RM159 bag) for the system. This system is priced quite competitively - I saved a bit more than RM100 for a comparable yellow/black one.
:)

material
Bag is non-waterproof, but water-resistant, perhaps due to the zippers.
Nylon material is with waterproof layer backing.
ABS base for sturdiness. I like this part, but worried that it would crack some day. So far, it's still good except for scratches at the edges.

stainless steel allen bolt
ALLEN BOLT
This is the most important bit, so read carefully.

It is not a simple means of securing the beam rack to the seatpost, in comparison to a quick release system. You would need a 5mm allen key to tighten the bolt.

I have to mention that the one that comes with the rack is best kept in your spares case. The allen key slot on the head would give way and get rounded by the torque applied in tightening up the rack to the post. In my case, the rack is an on and off affair - I have to tighten and loosen up the bolt many, many times due to that. And the bolt did become a bit rounded.

Do get a stainless steel one for a replacement, even if yours is new. Ask for an M8x30 allen bolt (button head) at a hardware store, or bring along the one supplied with the rack to get the identical item. I paid RM1.80 for the bolt, complete with nut and washer. It's the least I could do rather than modifying it to a quick release (anyone have a tutorial DIY for this?).
 
seatpost size
I'm not sure what's the range of seatpost diameter for the beam rack. I've been using it on three common sizes over the course of 14 months. 2 rubber strips, thick and thin are supplied with the rack, for shimming. Check with your seatpost manual if it could take the load. I surely wouldn't ruin a carbon seatpost with the beam rack clamp.
  • 31.6mm seatpost is ideal. Reduced swaying, as it is secured quite tight due to the big diameter.
  • 27.2mm is okay, but would sway and wobble up and down a little (just a wee bit), due to the thick rubber strip.
  • 30.9mm gives the worst sway of all three. Perhaps because the rubber strip provided are either too thin (this one is used) or too thick (can't be used) for 30.9mm seatpost. That being said, it is not that much, as long as the allen bolt is secured very, VERY tight. That's why you have to get yourself the stainless steel bolt.
Extra: carry in the bag's pocket a 5mm allen key, just in case if it does need re-tightening (that's just me, being extra prepared).

max load 10 kg
weight and load
The 700 g beam rack is rated for carrying 10 kg load. Including the bag, of course. The bag itself is about 1 kg. So you have about 9 kg load that you can stuff in the bag.

I don't know how much weight I loaded into the bag, but I make sure that it is not too heavy so that the beam wouldn't sway as I ride the bike off-saddle. I don't want to carry a heavy bag when off the bike, either.
 
Carrying is by a grip handle on the rear pocket, or a padded sling provided with the bag. The bag itself is a bit heavy, so I seldom use the bag by itself to go to the office.
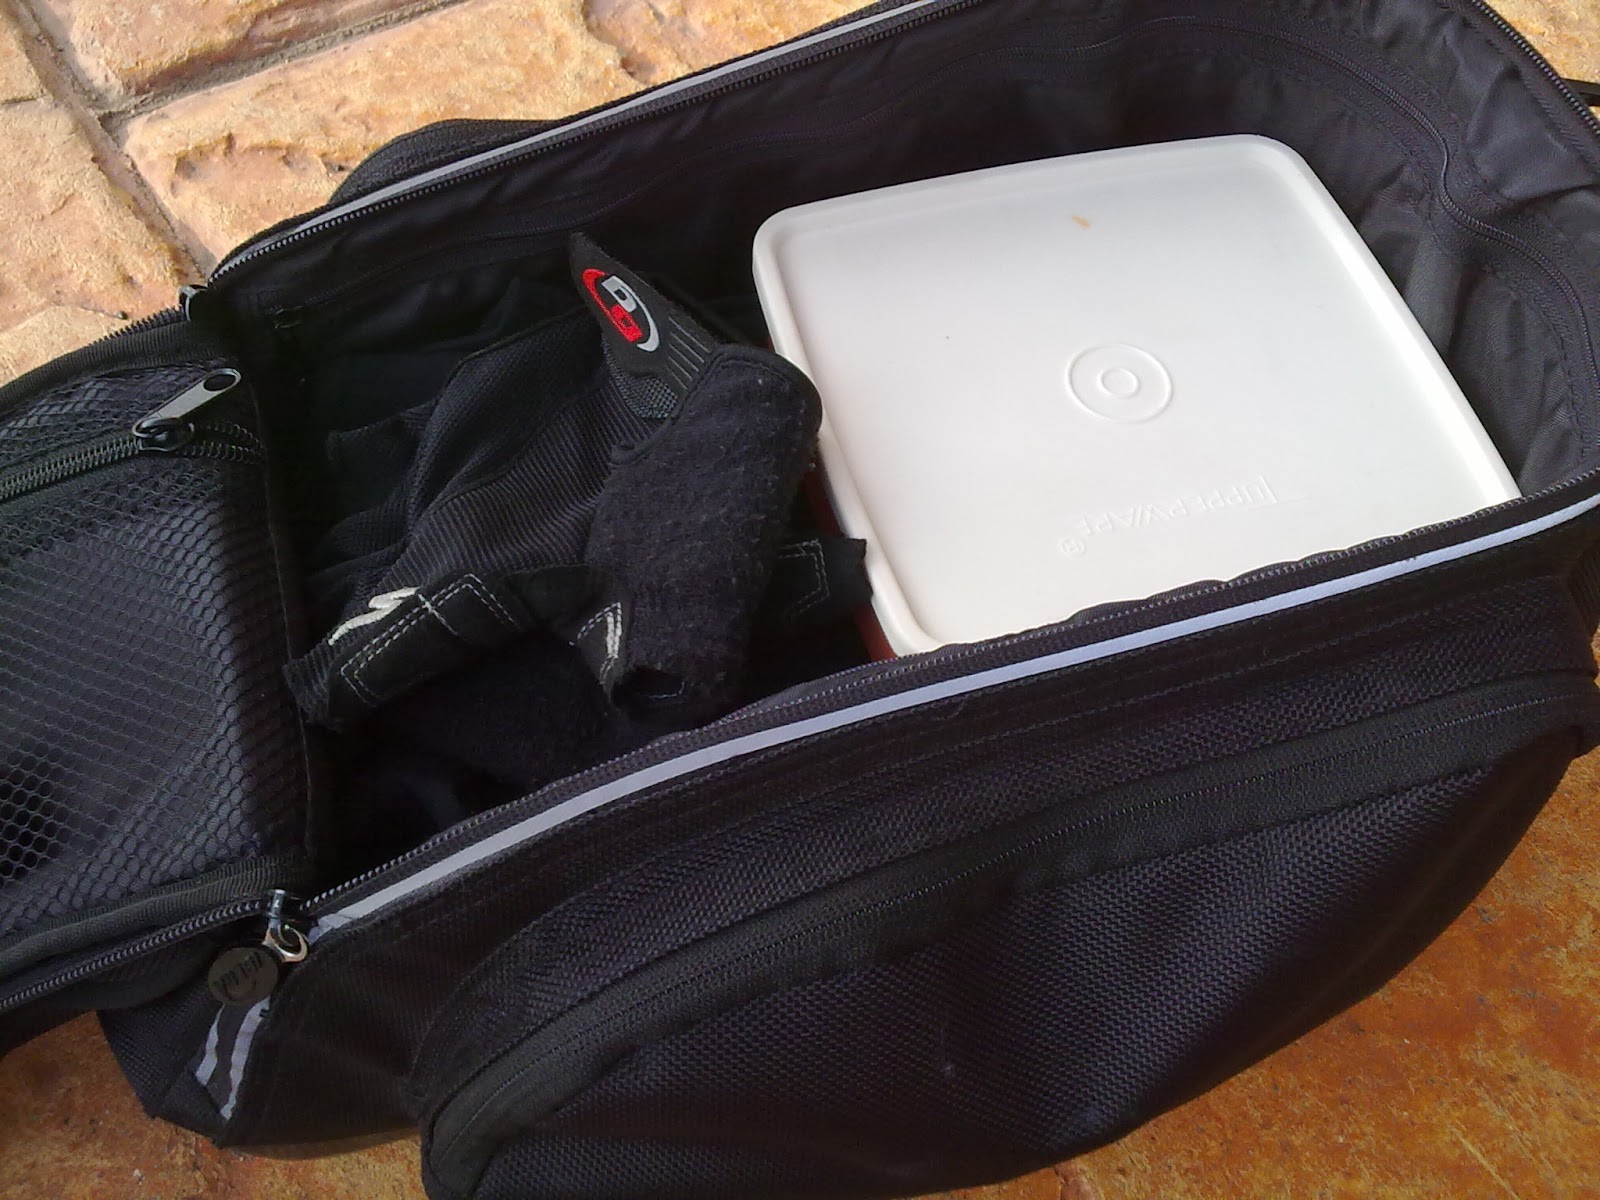
main compartment -
ample space for my daily essentials
bag space
The bag has a main compartment, 2 side pockets, a bungee cord on top of the main compartment lid and a zippered mesh underneath it, and a small rear pocket. There's also a zippered compartment on the lid top.

The maximum I carry at a time in the main compartment: a square Tupperware of breakfast, 750ml water bottle (occasionally), one khaki pants, one Endura rainjacket (quite thick when folded), one collared t-shirt and an underwear.

Side pockets are for storing tools and spares in one, and personal items in another. Rear pocket for small change and wallet. Zippered mesh is storing a handpump and spare tube. There's still unused compartment on the lid top. I spare that for extra breakfast (nasi lemak, or kuih for instance) or a face towel.
 
There you go, enough for everything, except a pair of shoes and toiletries. Well, I have those at the office.

lock-on mechanism on the rear
lock-on mechanism
The mechanism on the back of the bag provides a means for easy on and off of the compatible rack. However, the pushlock on the bag is not quite smooth, sometimes needing some fiddling due to some dirt lodged inside it. Once the tab on the front and the back (on the lock mechanism) are in place on the rack, there's minimal movement. It feels sturdy and solidly locked in place.

main compartment zipper
lined with reflector strip
safety
Safety aspect is taken care of. The main compartment zip is lined with reflective strips, so do the grip handle. There's also a loop for attaching a rear LED blinker. The beam rack has a bracket to mount a reflector (not provided).

overall
The bag and beam rack system is neat. It says "I'm a commuter" to whomever gazing at it. I like the shape of the bag. The shape is held so by the ABS base and the foam pad lining up the main compartment. The only thing that gave way is the bungee cord. The rubber cord is now expanded and not as elastic as new. I really recommend that the allen bolt to be replaced with a stainless steel one, if you're getting this system.

Is it worth the money spent? Yes.
Is it up for the job? Yes.
What can be improved? The weight of the bag, and perhaps to make it waterproof or at least a decent raincover.
Would I recommend it to you? Definitely.

more photos in here.


Tuesday, 22 March 2011

Review: NiteIze Marker Band

For my RTW, especially when riding wearing using long pants, the Marker Band is an indispensable item. It does a double job, safety wise: keeping the hem of the pants away from being stuck onto the chain/chainring whilst making me visible from rear.

NiteIze Marker Band on my right ankle
It's intended use is on the bicep; however, I use it on my right ankle while cycling.

It has a few options as a visibility marker:
Passive - reflective yellow band
Active - continuous red LED light
Active - blinking red LED light

The LED unit is the same as on the Sport Vest albeit shorter clear wand, with the same high quality for the make and material and with the same lighting modes - continuous, blinking and off. Battery is provided and I used the item straight away after taking it off from the packaging board.

NiteIze Marker Band

The unit is lighted by a small LED, and a clear wand is attached to it to disperse the light so that we get a long, lighted strip. Everything is encased in a reflective sleeve which is also fitted with loops to slip the elastic band in. The make is of high quality and feels durable too.

Visibility is good, and LED is bright eventhough it is encased in the reflective sleeve. The switch position is marked (printed) so that you won't have to wonder where it is. When using half finger gloves, I can feel the slight bump on the end of the LED unit - that's the switch. With full finger gloves, I have to look at the unit to turn on (or blink, or off) the LED.

Sporting an adjustable buckle on an elastic band, it is easy to strap on and to take off - the feature that I like most. As the strap is elastic, adjusting the buckle is easy - just fasten the buckle together, and pull the strap to your desired tightness. However, I'm afraid that over time it will give way. We'll have to see about that.

tuck the loose end in
Another thing to be careful with is that the elastic strap would have a long loose end dangling. I have about 3.5" loose end. This is foreseeable as the unit is intended to be used on the bicep. My biceps aren't big, either, and more so my ankle. I make sure that it won't get caught on the chainring by either tucking it under the marker, or just simply flip the buckle the other way around so that it would be on the outer side of the ankle. Having a proper way to secure the loose end (velcro, or provide a loop like a belt) would make it nicer.

At RM60 a piece, it is not cheap. But, you get what you pay for - high quality safety product. Other than the dangling elastic strap which is only a minor to me, there's practically no other negative side of the Marker Band that I've encountered so far. I'm quite happy with it.

Further reference:
NiteIze page on Marker Band

Marker Band is available locally through Gear 'n' Gadget.


Wednesday, 16 February 2011

Review: NiteIze SpokeLit

This item is neat and simple. Lightweight, too, and ready to be used right after you install it - battery is included. Plus, no tools required to install it onto your wheelset.
 
SpokeLit - shoved between my wheel spokes
Installation is a bit challenging although no tools required, and it is only suitable to 3-cross spoke wheels with normal spokes (14/15 gauge). It's a bit hard to get the spoke snugged into the groove on the SpokeLit. That being said, it is equally hard for the unit to come out from the wheel once set and slid further out from the hub towards the rim for increased holding. Definitely not for wheels with blade spokes, or the likes of Xero Element wheelsets. Make sure you have the right kind of wheelset (and spokes) in order to use this. Recommended for 32- or 36-spokes wheels.

lighted - static 
The lighting mode is continuous (press once), blinking (press twice) and off (third pressing). There's no special button on the body, just press on the middle of the unit's battery cover and it will lit. The body is translucent plastic, so the light coming out from the tiny LED is spread to the whole unit, effectively making it lit up; visible from either sides of the wheel.

 My unit is with red LED, suitable for use on the road in lieu of passive wheelset reflectors. When the wheel is spinning, you'll get a nice ring-of-light effect. Not highly visible from the rear or front of the bicycle, though, but definitely eye catching from the sides of the bike. I get 'whoa!'s from children on the roadside whenever I pass them by especially during night commute (adults would admire, too, but I know they'd suppress their awe).
:)

spinnin' around
Put it on your front wheel, and I would dare say that you'd also be glimpsing at your front wheel every 5 seconds to enjoy the glow.

I haven't tested it for waterproofness, i.e. direct spray, but after a few rides in the rain (and mud splats), the unit is still working. Thus, no worries in that department. The battery/LED/PCB dome cover which doubles up as the unit's on/blink/off switch looks the part in ensuring protection against water ingress.

It has high quality finish, and feel. Usage is perfect for night and dawn rides. My only gripe is on the installation bit. However, that also ensures that the unit won't fall of the wheel and lost along the roads. For that, I can still accept as it's a given.

Further reference:
NiteIze page on SpokeLit

SpokeLit is available locally through Gear 'n' Gadget.


Tuesday, 15 February 2011

Review: NiteIze LED Sport Vest

I received this for review last year, on Christmas Eve. Okay, that's not too long ago. Anyway, I've started using it for riding back from the office, whenever it's already dark out. Also for RTW when I'm early out while it's still relatively dark in the morning.

I was a bit reluctant to wear this at first, for it would be overkill with all the blinkers and reflectors that I already have on my bike, bag and right ankle. Well, in the interest of personal safety, I put it on and lit up the rear LED (continuous mode).

Of course, I myself can't tell if I'm highly visible on the roads at night. A friend passed me by in his car and commented that I was, due to the vest. So, in terms of being visible, it does the job.

It is lightweight, and airy due to mesh material used. The vest is adjustable on the waist with velcro continuing from elastic strap on left and right; within reach as they are on the front. There's a velcro fastener on the right shoulder. Combined with the front fasteners it makes wearing the vest is easy even when helmet is worn, or over a slim hydration pack. Be careful with the velcro fastener for it would catch the mesh and make it ruffled.

The red LED blinkers are of high quality, located on the left hand side, front and back. The LED is connected to a clear strip, effectively making the whole strip lit up, from the power supplied by a coin sized battery (included).

There are 2 modes: continuous and blinking. Press once for continuous, again for blinking, and the third would switch it off. If you're not using the blinkers (during the day) the fluorescent orange strips housing the LED strips are still visible from afar.

There are 2 strips of 3M Scotchlite reflectors, a bit higher from the waist, front and back across. The location of the reflectors is spot on. On the belly, it is visible from the front; if it's placed on the waist it would be hidden due to the riding position. At the back, it is not too far up either.

However, due to the traffic flow in Malaysia being on the left hand side, the postion of the LED strips would be better if it's on the right hand side. Well, this vest is imported from the US, so that's a compromise. I get around this by switching the vest's back side front. This makes the adjustment a bit difficult because I have to reach my hand to the back. The velcro on the shoulder helps a great deal when I just have to slip the vest from the top (sides already adjusted), past the helmet and just fasten the shoulder velcro.

If I could wish for an improvement, the front blinker should be white, while the rear blinker red. As it is, I switch on only the rear blinker wile leaving the front's switched off.

coiled and stashed under bungee cord on my commuter bag
Batteries are provided, the vest ready to be used the moment I took it out from the strikingly high quality packaging. Easily coiled (guided by the LED strips) and stash it inside my bag with minimal space required, or strapped under bungee cords on top of my commuter bag.

Overall it is a serious item for a serious commuter. At a glance, and further inspected, it boasts of high quality in material and make. Good for night (and dawn) rides, especially on busy roads.

Plus:
Lightweight and airy
High quality material and make
Adjustable, with velcro on shoulder
High visibility (LED, reflective strip, neon strip)
Ready to use with batteries provided

Improvement suggestion:
LED strips to be located on right hand side
Front LED to be white, not red

Available locally through Gear n Gadget.

biker and product image from NiteIze website


Tuesday, 8 February 2011

Review: Sub-Skin Heat Gear Compression Baselayer

not headless me!
 
I bought through BBS a long sleeve compression baselayer close to a couple of months ago, and have used it for offroad rides, night rides and RTW. In the swimming pool, too. You may have seen athletes wearing them for quite some time now, e.g. footballers in the English Premier League and Major League Baseball players. There are many brands available in the market, including Nike, Adidas, Canterbury, Skins, Zensah, Sub-Skin, Under Armour, etc. Google up 'compression clothing' or 'baselayer', and they'll pop out.
 
The one that I bought is Sub-Skin Heat Gear. That's the cheapest long sleeve I could find, at RM100 postage included. If you're lucky, you could pick up some (other brands) from bundle shops at dirt cheap price, as one of my fellow riders did.
 
What made me use it? A friend of mine suggested for me to try it, as a friend of his who studies sports science recommended so. The main benefit cited was regulation of body heat. The other benefit is that the one I bought is UV resistant, hence I don't have to lather up my arms with sunscreen (lazy!).
 
Compression baselayers have been touted as assisting in reducing fatigue, quick recovery, and getting more power from the muscle. However, those are not included in my reasons of donning the technical garment. In fact, I don't really feel any noticeable difference in those aspects, compared to wearing normal loose jerseys.
 
The one that I bought has anti-bacterial properties. As a result, it's not smelly after being soaked with my sweat from the riding. More importantly, I'm not smelly. It is not of branded technical cloth like X-static on one of my Brooks jerseys, but still it works fine.
 
Yes, I do feel cool when I don the tight fitting garment, with a normal loose jersey on top of it. That's because the material is thin so I need some sort of protection for the cloth itself, primarily; not because I don't have a six pack on my midsection, mind you. Ahem.
 
If you're unsure about the right size for you, furnish the seller your weight and height. He'll sort it out for you. In my case (170cm, 70kg), he recommended using M size and it is spot on. Not too tight, not loosey either.
 
It's counter-intuitive to wear a tight clothing when the weather is hot, but it works amazingly. This is because the thin layer of the cloth wicks away sweat from the skin thus giving the cooling effect. While having a break and idling around, I don't feel cool but it's not warm either. When getting back on the bike and as soon as I started moving, I feel the breezy cooling effect on my body.
 
During night rides, it doesn't make me feel too cold either. It's like it is regulating my body temperature. Like I mentioned, not cold, but not warm either. The cool, breezy feel is there, but not like it would chill my spine out. For my RTW, it felt quite cold at first when the body is dry, but then the temperature regulation takes place once I sweat out. Arrive at the office feeling cooler than without. Swimming? Yes, I wore it solely because I'm lazy to lather sunblock on my body. Also, it serves as a skinny bagging to cover up my midsection (ha!). Initially it is cold during the shower up and dipping into the swimming pool, but after a few minutes, its okay and I feel normal.
 
Is it a good buy? Indeed, for the things that I'm looking for, it works great. If it does assist in faster recovery, reducing fatigue and juicing up power from the muscle, then those are bonuses for me.
 
One thing, though. The seller informed that the cloth should not be washed using washing machine, hand wash only. I see that the instruction states not to wring it. Me? I'm lazy. In the machine it went. So far, it's coming out ok. Well, so far...
 
image from Sub-Skin's ad in BBS.


Wednesday, 22 December 2010

19.12.2010 Seri Alam Offroad - retracing PER 2010 route

As usual, I cycled to Ruza Café at Taman Scientex for the Sunday offroad dose. Not many riders around. Had my breakfast, and the 6 of us went off at 8.44 am towards Seri Alam. EG as the lead, followed by Tulang, myself, Yahaya, Atuk, and Mlake. Well, generally for most of the time, in that order.
:)
 
The ride objective for that day was to follow the recent Plentong Epic Ride's route, covering checkpoints 1, 2 and 3. I personally like the idea, for I haven't got the opportunity to ride through the checkpoints.
 
7.4 km on road with a little bit of offroad cutting from Nusa Damai towards Seri Alam, we reached Cactus Inn. It's quite devastating to see the vast clearing of what used to be palm oil plantation. The area is for the development project of UiTM Seri Alam. We went down to the rubber trees and towards Plentong. Right at the T-junction, we met Sham on his Kawasaki who ventured the Plentong offroad alone.
 
After a much needed breather (for Mlake, especially), we parted ways and headed to checkpoint 1 which is not too far away. Much of the pink paper markings stapled to the leaves from the last 3 weeks are still there, aiding our navigation. The plastic wrapped distance marking towards CP1 were also intact.
 
Somewhere along the way from CP1 to CP2, EG met with an accident. His handlebar on the left end met with a big branch of a tree while negotiating a twist, speeding through the sweet singletrack. Fear struck as initially it was suspected a bone fracture on his left hand pinky. We splint his finger with a pair of sticks and wrapped with a gauze roll. After things settled, we moved on; of course, at a much slower pace this time.
 
I have to say that the singletracks are amazing. There were many sections that I have never ridden before. From CP1 to CP2, we had to carve Bukit Panjang. I looked forward to it, for it has been a very long time since I last went up. The other intention is to see how good Panaracer Rampage is in scaling it, the uphill is with a thin layer of moss over hardpack in the middle.
 
Well, the initial climb was not good. I dismounted prematurely at a jutting root crossing, and my handlebar rotated about 70 degrees too. After that, I climbed to the top without much problem. Had a breather beneath the pylon, then towards CP2.
 
By the time we reached CP2 (also serves as the same spot for CP4) it was already 12 noon. Unanimously agreed to call it a day and went out to Cactus Inn.
 
Personally, I would very much keen to complete the other CPs. Next time, perhaps in January, before the GA MTB Ride 2011 event. For this one, I enjoyed it tremendously.
 
Thanks for coming over.
Relish our rides.


Thursday, 9 December 2010

07.12.2010 - Skudai Trail Offroad Edisi Awal Muharram 1432H

Zul melayan Plastic Cup, dengan fullsus barunya
 
Awal Muharram 1432H, rakyat Johor bercuti.
 
Aku gantung basikal kat kereta (rak cap ayam kat belakang aje), dan memandu menuju ke Skudai. Sepatutnya berkumpul 7.00 pagi (awal banget!), tapi aku pukul 7.00 tu baru nak hidupkan enjin memulakan perjalanan (pemanduan), dan aku hantar SMS pada Ijat si tuan tanah Skudai Trail, bagitau on the way dah... (dah masuk kereta, kira dah on the way lah tu).
:)
 
Ramai rupanya yang ada, untuk kayuhan pagi tu. Aku ingatkan cuma bertiga - aku, Ijat & Azam. Tujuh kesemuanya: Aku, Ijat, Azam, Haziq, Hafiz, Faidi & Zul. I like. Dalam masa yang sama, segan juga pasal sampai lambat.
 
Cuaca pagi tu memang bagus, alhamdulillah. Redup aje, dan tak ada tanda-tanda akan hujan.
 
Kitorang kayuh kat lingkaran luar dulu melalui projek terbengkalai, dan tak lama lepas tu dah sampai ke permulaan singletrack. Mula-mula sekali, Ijat ajak masuk ke Plastic Cup trail...
 
Mula masuk ke Plastic Cup, terdetik di hati bagai di alam yang lain. Dengan cuaca yang redup, ditambah rimbunan pohon getah tua, suasana di dalamnya sepanjang denai terasa nyaman dan segar. Ianya agak teknikal, tetapi boleh dikayuh jika cukup skill (bukan aku lah tu). Tak kurang mencabar juga, dengan laluan turun dan juga datar yang bersimpang siur. Aku suka bahagian cerunan turun beralun. Memang syok layan.
 
Habis Plastic Cup, keluar dan balik semula ke permulaan tadi, lepas tu sambung pulak ke Denai. Yang ni pun aku suka, pasal ada technical climbing. Dah tu disaji pulak dengan Drop Zone. Aku tak turun, cuma ambil laluan pintas sebab kat bawah tu ada lecak - tak nak kotorkan basikal (konon...). Pengakhir Denai: ada satu cenuram agak tinggi juga. Kalau aku tak cuba turun, tak best lah kan, datang dari jauh tapi tak cuba. Maka aku turun lah... Rasa macam laju aje, tapi tak tau lah kalau sebenarnya nampak perlahan.
 
Dah tu kitorang lalu Double Trouble. Aku pun tak berapa ingat, tapi ada lah juga lalu lereng-lereng bukit. Kat tepi semacam gaung, cuak juga kayuh singletrack tu.
 
Keseluruhannya aku suka dan akan datang berkunjung lagi ke sana kalau ada peluang, insyaAllah. Ada macam-macam, kebanyakannya teknikal, dihidang dalam pakej yang padat - kurang dari 10 km panjangnya. Ada juga beberapa laluan fast singletrack untuk pelesit-pelesit membesit. Tahniah dan terima kasih untuk Ijat, Azam dan orang Skudai (pemotong getah) kerana meneroka denai kat kawasan tu, dan sudi bawak aku kayuh sama.
 
Gambar apa yang ada, di sini.


Monday, 6 December 2010

In Praise for Plentong Singletracks

the canopy at Plentong - one of my favourite sections
 
Much has been said about PER 2010, and all that came to my ears are good responses (so far). However, this one thing makes me feel elated, and at the same time a bit lowly for sometimes I take for granted my offroad rides in Plentong.
 
Why?
 
The rider/writer mentioned
I was riding behind Alex McNab on one of those singletracks when I told him how nice if we could trade RRI for Plentong! Meaning we needn't have to drive 4 hours and all those fabulous singletracks would be just in our backyard!
quoted by Yellow Manta, from PCC's Spokes n Nipples Weekly Newsletter 10 Nov 2010 (Issue 521-47-2010), pages 3-5.
 
Plentong singletracks are close to my house, and I could ride through it from my home without me having to spend a single sen on fuel. It is rather common for people not to know what kind of a gem they have in hand and treat it like some ordinary glass. It's the case of "it's greener elsewhere". You get what I mean?
 
Whenever time, circumstances and (especially) $ permits, I would sample trails that other riders ride for their normal weekend rides, and this usually comes in a form of a jamboree ride. A few that I like which are unique, and unlike Plentong trails - The Dream technical descent and Steroid Hill in FRIM, and the terraces of Bandar Tasik Puteri. If I get the opportunity, I would sample more trails and repeat those I mentioned. Still, Plentong gives me much satisfaction in terms of all-in-one offroad rides. As Azman of Element Cycles put it, "Plentong is your 'license' trail. Everything is there - mud, sand, lake, river, hills, downhills, singletracks, rock garden, you name it". Heck, there's even a badminton court - right after a series of singletrack downhill.
 
With that, and the limited opportunities now for my offroad rides, I would enjoy as much as I can those sweet trails in Plentong. I urge you to do the same, wherever you ride.
 
Have you been to Plentong?
;)
 
note:
the link is not a permanent link to the newsletter, thus newsletter date and number given for reference.


Saturday, 4 December 2010

Review: The Sensus Black Grips

slip-ons by the sensus.
notice the cut guide line
Designed by Cameron Zink, he obviously knows what he wants in a pair of grips.

Simple, soft and tacky grips with flange. The pair looks long perhaps because there are no lockrings on either ends. Quite slim, too, and my fingers wrap around them nicely.

Installation is quite a job, and definitely not as easy as lock-ons. The inner diameter is designed to be smaller than the diameter of handlebar ends so that it would grip securely once installed. It has to be so because these are a pair of slip-ons. Don't worry, as the installation tips are included on the reverse of the packaging cardboard. Pretty good tip, I've never thought of using zipties to install slip-ons before this. Also, the rubber compound itself is tacky, adding to the grip.

Not much twisting after a couple of months' rides on my RTW Machine. Of course, there is some, and this could be remedied by employing zipties as a DIY lock-on at both ends.

ribbed for the sensation
These are a pair with flanges, with cut lines as a guide in case you'd want them off for clearing the thumbs to shift the gears. The wavy rib patterns are like old skool BMX grips, which I like very much. My thumbs are on a high rubbing on them while riding (!). Well, the real intention for that, I presume, is the grip (what else?) that it provides and, a bit of a squingy feel without being thick overall.

I used them on road, so far, with and without gloves, full and half fingers. I like them best with half finger gloves - for my thumbs, of course.

I removed them to install on my XC rig. Because of the tacky compound, it's quite hard to get them all. Impossible to slide out, but rolling them over (like condom), did the trick. Not to roll it completely though, for it would be impossible then to return it to the normal state. Just up until near the bar end, say 10 mm or so, and then slide them off.

Zink's 360 right after the Icon Sender
Check out the vid of Zink's winning run at Red Bull Rampage 2010.
He's got a pair of these assisting his grip on his 'bar (okay, that's a bit cheesy).

slip-ons installation - on the back of the cardboard
Also, a vid from pinkbike.com for grips installation.